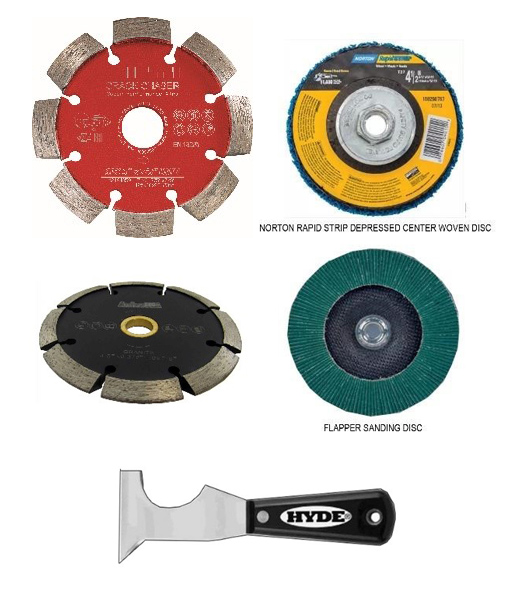
TOOLS1. 4" Right Angle Grinder. |
 |
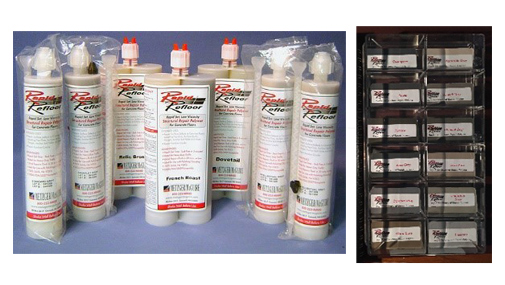
MATERIALS1. Rapid Refloor Note: For best color match to existing floors obtain a color sample kit from Metzger & McGuire. Sand the face of the color sample prior to use, the color will lighten from the sanding process. 2. Other low viscosity rigid epoxy/urethane.
|
 |
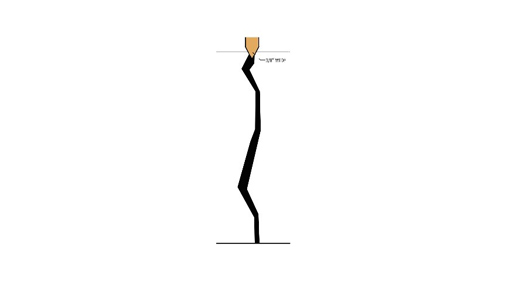
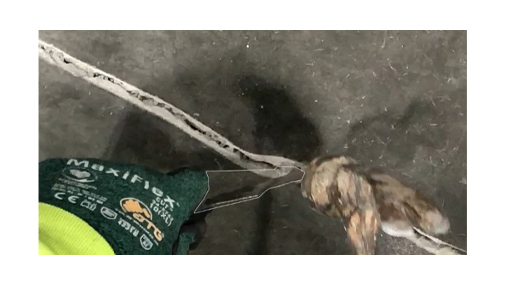
CRACK REPAIR PROCEDURES1. Chase the crack a maximum of 3/8” wide using the “V” Blade
|
 |
|
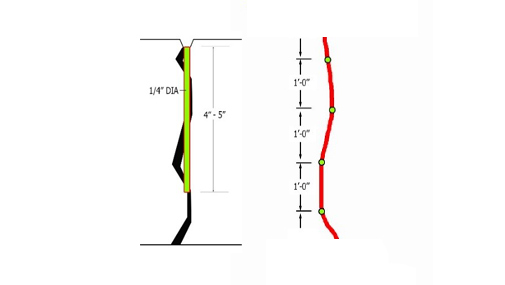
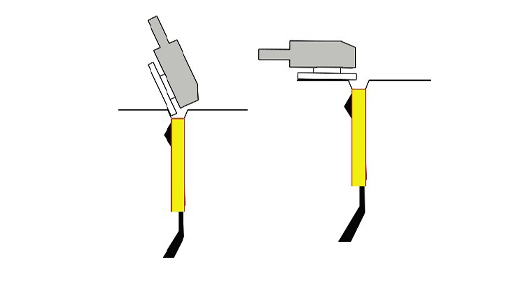
2. Using a ¼’ diameter bit, drill 5” deep Pilot Holes @ 12” O.C. • The drill bit should not touch the top edges of the “V” or chipping will occur.
|
 |
|
3. Using a 5/16” diameter drill bit, Re-Drill all ¼” holes 4” – 5” deep. • If the drill bit is chipping the edge of the ”V”, slightly widen the “V” to provide additional clearance.
|
 |
|
4. Using a blade and or small chisel, clean the crack and remove any unsound concrete.
|
 |
|
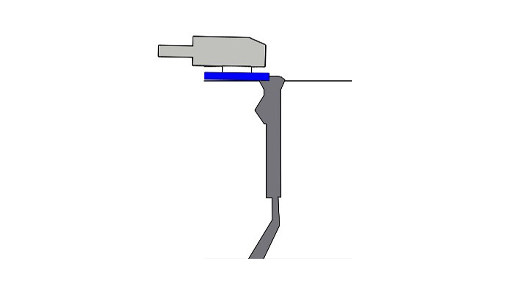
5. Using the 100# flapper wheel lightly sand down the face and edge of the “V” removing exposed fiber and creating a sharp edge (corner). • Do not round off the corner.
|
 |
|
6. Vacuum then blow out the repair.
|
|
|
7. Inject 4 pumps (handle squeezes) of Rapid Refloor into the injection ports (drilled holes). • Allow the Rapid Refloor to begin to gel in the bottom of the crack approximately 5 – 10 minutes.
|
 |
|
8. Remove any hardened Rapid Refloor from the face of the “V” using the 80# flapper wheel prior to installing the top layer of Rapid Refloor. 9. Fill completely leaving it slightly high. 12. Sand down the Rapid Refloor using a blue Norton Strip Disc. Note: The Norton Strip Disk will sand down the Rapid Refloor without burning up the edges. 14. Install a light application of the densifier that was used on the existing floor. Back drag using a micro-fiber mop to remove excess.
|
 |
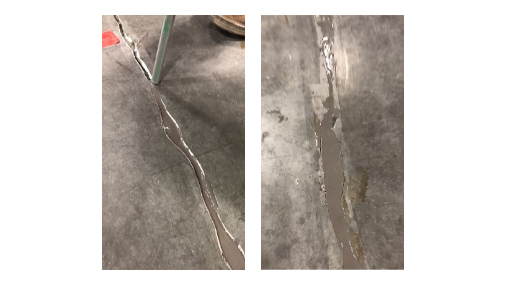
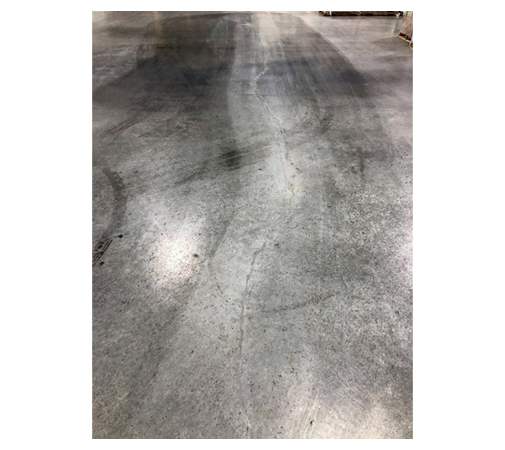
COMPLETED REPAIR
 |
gcpat.com | North America Customer Service: +1 (877) 423 6491
We hope the information here will be helpful. It is based on data and knowledge considered to be true and accurate, and is offered for consideration, investigation and verification by the user, but we do not warrant the results to be obtained. Please read all statements, recommendations, and suggestions in conjunction with our conditions of sale, which apply to all goods supplied by us. No statement, recommendation, or suggestion is intended for any use that would infringe any patent, copyright, or other third party right.
DUCTILCRETE is a trademark, which may be registered in the United States and/or other countries, of GCP Applied Technologies Inc. This trademark list has been compiled using available published information as of the publication date and may not accurately reflect current trademark ownership or status.
© Copyright 2020 GCP Applied Technologies Inc. All rights reserved.
.
GCP Applied Technologies Inc., 2325 Lakeview Parkway, Suite 475, Alpharetta, GA 30009, USA
GCP Canada, Inc., 294 Clements Road, West, Ajax, Ontario, Canada L1S 3C6
This document is only current as of the last updated date stated below and is valid only for use in the United States. It is important that you always refer to the currently available information at the URL below to provide the most current product information at the time of use. Additional literature such as Contractor Manuals, Technical Bulletins, Detail Drawings and detailing recommendations and other relevant documents are also available on www.gcpat.com. Information found on other websites must not be relied upon, as they may not be up-to-date or applicable to the conditions in your location and we do not accept any responsibility for their content. If there are any conflicts or if you need more information, please contact GCP Customer Service.
Last Updated: 2024-06-21
https://gcpat.com/en/solutions/products/ductilcrete-engineered-slab-systems/crack-repair-procedure-min-width-0016in